AspNet Identity Cookie Format

I’ve been reached out by one of my readers with a list of questions about AspNet Identity. First I thought the questions will be easy and I’ll wing them, but turned out that every single question in the list is worth of a separate blog post. So I’ll do a mini-series of Q-A posts about Identity framework and related stuff.

First question is about security token in a Cookie and how it is computed: Identity Framework creates a token in the cookie, token containing the same information (User.Id, Security Stamp, etc.); if the same user loggen-in in Chrome and Firefox, why are the cookies different?

I did think about it for a while, I guessed that cookie creation and expiration is encoded in the cookie, along with some sort of signature of the cookie. My guess was not far from the real world.

Fortunately, the code that deals with cookies is in Katana Project and is open-sourced.

Continue reading

AspNet Identity and Owin. Who is who.

Recently I have found an excellent question on Stackoverflow. The OP asks why does claim added to Idenetity after calling AuthenticationManager.SignIn still persist to the cookie.

The sample code was like this:

ClaimsIdentity identity = UserManager.CreateIdentity(user, DefaultAuthenticationTypes.ApplicationCookie );

var claim1 = new Claim(ClaimTypes.Country, "Arctica");
identity.AddClaim(claim1);

AuthenticationManager.SignIn(new AuthenticationProperties { IsPersistent = true }, identity );

var claim2 = new Claim(ClaimTypes.Country, "Antartica");
identity.AddClaim(claim2);

Yeah, why does claim2 is available after cookie is already set.

Continue reading

Rename Authentication Cookie Name of Asp.Net Identity

When I’d like to find out about technologies used on the site, I look on HTTP header, then on cookies. Usually combination of these can give me a pretty detailed information about underlying technology used. Cookie names are very bad for that – search for any cookie name and you’ll get a lot of information about the technology.

To hide yourself, you can rename cookies from standard to something random. In Asp.Net Identity you can do that via CookieName property on CookieAuthenticationOptions class in configuration:

app.UseCookieAuthentication(new CookieAuthenticationOptions
{
    AuthenticationType = DefaultAuthenticationTypes.ApplicationCookie,
    LoginPath = new PathString("/Account/Login"),
    Provider = new CookieAuthenticationProvider
    {
        OnValidateIdentity = SecurityStampValidator.OnValidateIdentity<UserManager, ApplicationUser>(
            validateInterval: TimeSpan.FromMinutes(0),
            regenerateIdentity: (manager, user) => manager.GenerateUserIdentityAsync(user))
    },
    CookieName = "jumpingjacks",
});

See the jumpingjacks string? that will be the cookie name when users login. You can find the full project source code in my Github repository

Deploy Web Solution on Build

There are plenty of articles about how to deploy a solution to Azure Web-Sites. I’ll just leave this here for myself:

msbuild .\SolutionName.sln /p:DeployOnBuild=true /p:PublishProfile=ProfileName /p:Password=passwordForAzurePublishing /p:AllowUntrustedCertificate=true

This builds solution according to previously configured Publish Profile.

  • Good thing that all the configurations parameters are stored within Profile, where you can tell the thing to pre-compile the views and publish to folder where you need it.

  • Bad thing – you can’t specify where deploy to, as that is specified in the Publishing Profile. But you can configure different profiles to publish to testing and to production.

  • Another very bad thing – you can’t provide it with a pre-built web-deploy package, this builds the solution again every time you execute it. And this breaks the rule of Continuous Integration and Deployment: “Build once, deploy everywhere”. Suppose you have a Build Server with process that looks like this: Build => Run Unit Tests => Run Integration Tests => Deploy to Testing => Deploy to Production. And if for deployment you use the line I quoted above, you will be compiling your sources 3 times: first time to run tests, then every time to deploy. In some sense this is OK, because you are building from the same sources, but this is a waste of time. If I build my application with pre-compiled views, this can take a while. One of the applications I work on has 800 views and compilation of all these views takes about 7 minutes. If I compile them once, and re-use that, I don’t need to wait another 7 minutes for deployment to production. Well, OK, OK! Msbuild has got some clever stuff in it and probably will not re-compile all the views if nothing have changed and second time it’ll take less time to do compilation, but that still bothers me. Hopefully new Asp vNext will do something to make my life easier in this sense.

ASP.NET Identity and CryptographicException when running your site on Microsoft Azure Web-Sites

UPD: Here is another good solution to this problem if you are running your own IIS.

Last week I was updating one of applications I work on to ASP.NET Identity. For a specific reasons I could not deploy to Azure for a while. But I did run all the tests locally and everything worked just fine.

When I mostly finished with Identity conversion, I finally managed to deploy the application to Azure Web-Sites. And it worked fine.. until I tried registering a user.

At that point I had an exception exploding in my face:

System.Security.Cryptography.CryptographicException: The data protection operation was unsuccessful. This may have been caused by not having the user profile loaded for the current thread's user context, which may be the case when the thread is impersonating.

Continue reading

How to debug emails in your application with Sendgrid and Mailtrap.io

Email testing is always a pain. One of the “OOOPS” moments I had with email was when on testing instance of the application I started resetting user password. And the application started sending out actual emails to users. People did get “Your password reset link is here” and pointing to the testing instance of the application.

At that point I started wondering how can I isolate the emailing in production and emailing in dev and test environments. Production system must send out real emails to real users. Emails issued by testing and development installation must not send out emails to users, but rather have them collected somewhere. For a long time I had very basic configuration that checks if we are not in production environment, do not send emails at all. That worked fine for some time, but I lacked ability to check if emails were sent out or not.

There are many solutions for fake SMTP servers for dev-machines: you set up SMTP server on your machine, point your smpt credentials to this server and all emails are collected on that fake server. That works if you are just a one-man developer. If you have a team of devs, every single one of them must install this server, and for their home machines. A bit too much work for my liking. Also this approach does not work for testing environment – when the application is deployed to a web-server identical to production. And actual users are having a go on the system. Where do you install that fake server now? How can you show email messages to the user, without sending them?

Continue reading

ASP.NET Identity – User Lockout

I’ve spent a few hours trying to figure out why my code does not work, and I have not found any explanations to the issue, so might just write it down here.

In ASP.NET Identity there is a concept for user locking out. You can specify how many attempts user can gets before the lock-out kicks in and for how long the lockout is enabled. This is a widely known, from all the articles online. But what these articles don’t say is that users can be opted-in and opted-out from this process.

If you look on IdentityUser class, there are 2 fields that relate to lockout: LockoutEnabled and LockoutEndDateUtc. My first reaction was that LockoutEnabled says that user is locked-out and LockoutEndDateUtc is time when the lockout expires.

Turned out that I was wrong. LockoutEnabled is a flag saying that user can (or can not) be locked in principle. I.e. opt-in flag for locking. So if we have an admin user who we don’t want to lockout ever, we’ll set this flag to be false. And for the rest of user-base this should be set to true.

To check if user is locked-out use UserManager.IsLockedOutAsync(user.Id). Function UserManager.GetLockoutEnabledAsync() checks if user is opted in for lock-out, it does not check if user is actually locked-out.

And fields on IdentityUser – don’t use them to detect is user is locked out, they are lies! Use UserManager functions to detect user state.

Hope this will save some people a head-banging, cause that caused me some stress!

Update 27 Aug 2014

To enable locking-out UserManager should have these flags set:

//lockout users for 10 minutes
UserManager.DefaultAccountLockoutTimeSpan = TimeSpan.FromMinutes(10);

// takes 6 incorrect attempts to lockout 
this.MaxFailedAccessAttemptsBeforeLockout = 6;

// when new user is created, they will be "lockable". 
this.UserLockoutEnabledByDefault = true;

To lockout user you can do this:

user.LockoutEnabled = true;
user.LockoutEndDateUtc = DateTime.UtcNow.AddMinutes(42);
await userManager.UpdateAsync(user);

This will set the user to be locked out for 42 minutes from now. However, this is not recommended way to lock-out user, this is what the framework does in the background. There are ways users can lock themselves out.

If you are updated to AspNet Identity 2.1 (which has been released recently). You should use SignInManager:

var signInManager = new SignInManager(userManager, authenticationManager);
var signInStatus = await signInManager.PasswordSignInAsync(username, password, isPersistent, shouldLockout);

If shouldLockout is true, user is getting locked out after a number of failed attempts to login.

PasswordSignInAsync method does the following steps:

  • checks if user with given username exists;
  • then checks if this user is not locked out;
  • if password is correct, redirects logic to 2FA (if it is enabled);
  • if shouldLockout is true, then on incorrect password increases number of failed log-ins on user record.

If you have not updated and still using Identity v2.0 do the following. On every failed attempt to login, call the following

await userManager.AccessFailedAsync(user.Id); 

IdentityUser class have property AccessFailedCount. The method above increases count on this property. If count is greater than UserManager.MaxFailedAccessAttemptsBeforeLockout, then user is getting locked out: user.LockoutEndDateUtc is set to a date in the future and resets AccessFailedCount to zero.

When user is signed-in successfully, you need to reset AccessFailedCount to zero. Do it by calling:

await userManager.ResetAccessFailedCountAsync(user.Id);
User impersonation with ASP.Net Identity 2

UPD July 2017: If you are looking to do User Impersonation in Asp.Net Core, read this article: http://tech.trailmax.info/2017/07/user-impersonation-in-asp-net-core/

Recently I’ve migrated my project to ASP.NET Identity. One of the features I had in the project is “Impersonation”. Administrators could impersonate any other user in the system. This is a strange requirement, but business behind the project wanted it.

This is the old impersonation way:

  1. When admin wanted impersonation, system would serialise information about admin account (mostly username).
  2. Find account for impersonated user
  3. Create a new authentication cookie for impersonated user
  4. As data add serialised information about admin account to the cookie
  5. Set the cookie
  6. Redirect admin to client page.
  7. Bingo, admin logged in as a client user.

To de-impersonate repeate the process in reverse. Get data about admin from cookie data (if it is present), delete cookie for client-user, login admin user again. Bingo, admin is logged in as admin again.

Here is the article how the old way is implemented

This exact code did not work with Identity framework. I tried finding the solution online, but nothing was available. My question on Stackoverslow immediately got 4 up-votes, but no answers. So people are interested in doing it, but nobody published any material on this. So here I am -)

Continue reading

Disable StyleCop for a solution/project

In the office we use StyleCop to make sure everyone writes code in the same style. And all of us have StyleCop installed coupled with Resharper. So whenever you have a violation of StyleCop rule, Resharper highlights the issue via squiggly line. And all our projects do conform to our StyleCop settings.

But I do look on code of many other projects – I have source code for most of the dependencies we use, like Entity Framework, Nlog, etc. And looking on other people projects is painful because of StyleCop:

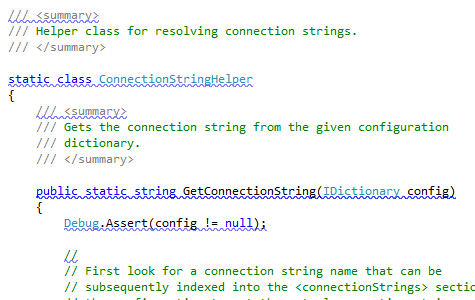
See these lines – they annoy me. And just make code unreadable. And there is no simple way to turn off StyleCop in R# or VS, you’ll have to suck it up.

Or follow instructions in this post: http://stylecop.codeplex.com/discussions/285902
Basically there people say create Settings.Stylecop file with the following contents:

<StyleCopSettings Version="105">
  <GlobalSettings>
    <BooleanProperty Name="RulesEnabledByDefault">False</BooleanProperty>
  </GlobalSettings>
</StyleCopSettings>

and place it in the folder next to *.sln file. This disables all the StyleCop rules for the solution.

For my own convenience, I’ll place this file here: settings.StyleCop
You’ll have to remove .txt extension to make things work. Otherwise your antivirus might not like the file.

C# Homoiconicity in practice or Rendering Identical Résumé in Word and PDF From a Single Serializable Domain Structure.

TL;DR: Watch video by Mark Seemann about Homoiconicity in C#. Appreciate his sample implementation. Go see my simplistic implementation that is actually is used in production.

Homoiconicity is ability of code to be manipulated as data and data presenting code. I’m not sure I completely understand the concept, so I’m not going to try to explain it here. Honestly, just watch the video by Mark Seemann about Faking Homoiconicity in C#. After the video all what I’m talking here will make much more sense!

In his talk, Mark describes an application that generated loan proposal document that had complex logic and had to output document to a printer. For my project I had to generate a résumé into both Word and PDF formats. I inherited the project, so PDF generation was already done. I only needed to create Word document. Easy said!

Problem was that PDF generation was tightly coupled with PDF rendering engine and was in a bit of a “state”. When this part of project was written the developers did not know any better way to do it. And I did not imagine this can be done in a neater way. Until I saw Mark’s talk.

Continue reading